DAW IT User manual

englidh language

You are on DAW IT User Manual > Contents > Edit Fader

Edit Fader

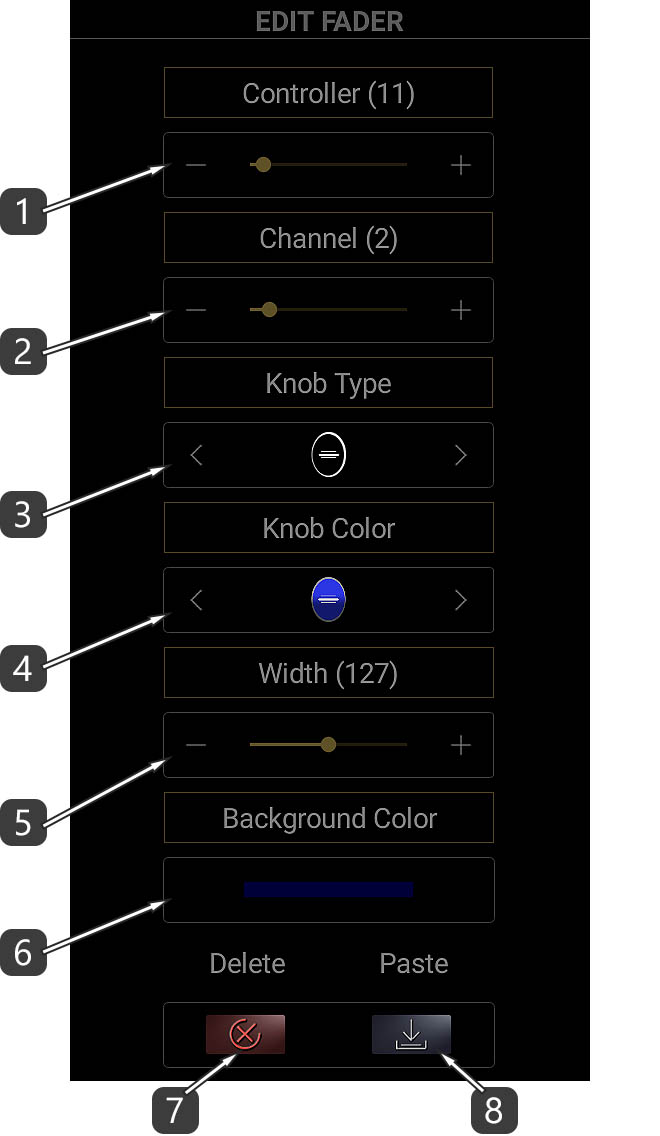
You entered the Edit Fader screen by tapping on the number located over each fader.

Description

edit fader numbered description
  1. Select Controller number (range: 0-127).
  2. Select MIDI Channel (range: 1-16).
    – If you use the fader to control virtual instruments or effects then select MIDI channel 1.
    – If you use the fader to control your DAW elements eg. the volume of a track, then select a MIDI channel other than 1.
       Then you should exclude this channel from recording MIDI data. (see example)
  3. Select the fader Knob type. There are 4 types available:
3D sharp fader

3D sharp

monochrome fader

Monochrome

monochrome wide fader

Monochrome Wide

3D round fader

3D round

  1. Select the fader Knob color from a palette of 8 colors.
  2. Set the width of the fader.
    Please note that the fader width depends on your device screen properties.
  3. Set the fader background color (see the Color Picker).
  4. Delete the fader.
  5. Paste Settings.
    Every time you edit a fader, its properties are copied in the clipboard.
    The clipboard holds only the properties of the last edited fader.

Useful Tip !

Edit a fader, then edit another and press Paste Settings button.
It works like copying a fader!

Edit Text Label

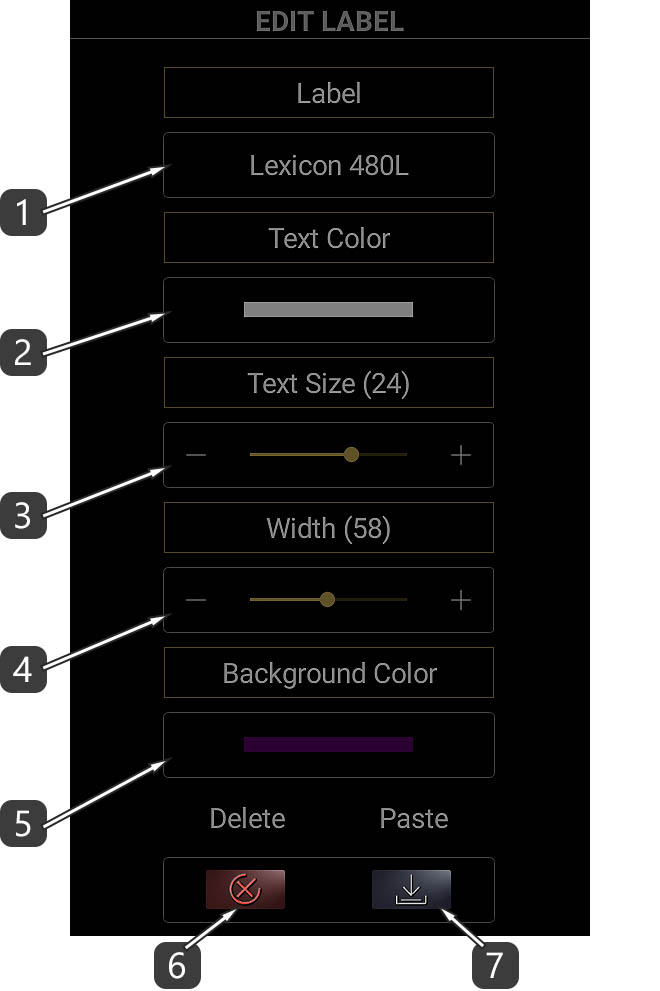
You entered the Edit Text Label screen by tapping on letter “T located over each text label.

Description

edit label numbered description
  1. Set the Text Label.
  2. Select the text color (see the Color Picker).
  3. Set the text size.
  4. Set the width of the text label.
    Please note that the text label size and width depend on your device screen properties.
  5. Set the text label background color (see the Color Picker).
  6. Delete the text label.
  7. Paste Settings.
    Every time you edit a text label, its properties are copied in the clipboard.
    The clipboard holds only the properties of the last text label you edited.

Useful Tip !

Edit a text label, then edit another and press Paste settings button.
It works like copying a text label!

Edit ALL Faders / Text Labels

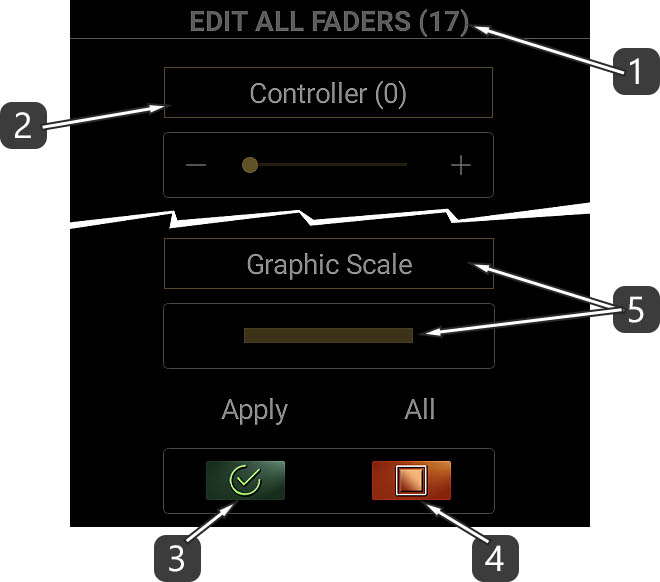
This function lets you change specific properties for ALL FADERS and ALL TEXT LABELS.
All properties fields are disabled by default.
At first, tap on the title of the property you want to edit in order to enable it.

Description

edit all faders numbered description
  1. This number indicates the amount of all Faders or Text Labels.
  2. Tap on the title of the property you want to edit in order to enable it.
  3. Press APPLY to execute the command.
    Any property which is disabled will not be applied.
  4. This button enables / disables all the properties.
  5. If you want to see a graphic scale underneath all faders, just choose its color, otherwise set its color Alpha (transparency) to 0.
    (see Color Picker below)

Color Picker

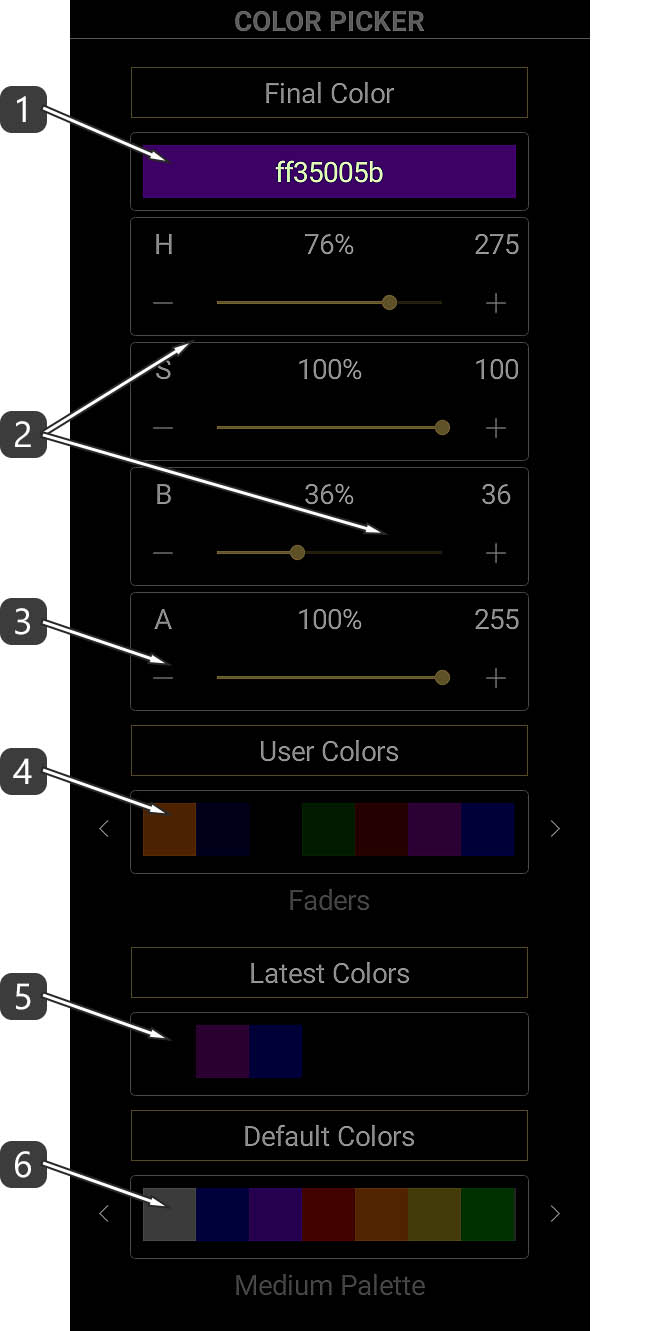
With the Color Picker you can select colors !
There is a Hue / Saturation / Brightness (HSB) method with sliders and +/- operators.
Also, there is a palette of last used colors and a palette of default colors for quick access. 

Description

color picker numbered description
  1. This is the selected color code in hexadecimal mode.
    In the screenshot above, the first 2 characters (FF) represent the transparency.
    00 means “transparent” while FF means “opaque”.
    The other 6 characters represent the color in RGB mode.
    This field is an editable text box. This means that you can enter manually or paste a color code.
    – Please do not forget to always enter the first 2 digits for transparency. –
  2. Move the sliders or use the +/- operators to select HSB values.
    HSB stands for Hue, Saturation, Brightness. Sometimes Brightness is called Lightness or Luminance.
  3. Move the slider or use the +/- operators to set transparency amount.
    0 means “transparent” while 255 means “opaque”.
  4. These are the latest user colors palettes. Slide left or right and tap to pick a color.
    Use the arrows to select user colors from the 3D Pads or the Buttons too.
    These palettes are saved inside the app for further use.
  5. This is the latest chosen colors palette. Slide left or right and tap to pick a color.
    This palette is temporary and cannot be saved.
  6. These are the default colors palettes. Slide left or right and tap to pick a color.
    Use the arrows to select between Light, Medium or Dark palette.

Example

dawvelopment logo