


Buttons are simple MIDI switches, like on/off switches.
The buttons section consists of 2 panels. Each panel can hold 120 buttons, total 240 buttons maximum per preset.
The 1st panel sends MIDI Controllers (range: 0-127) through MIDI port. Their values are 0 (=ON) and 127 (=OFF).
The 2nd panel sends MIDI Program Changes through MIDI port (range: 0-127).
You can swap these 2 panels by a single tap. (see description #8 below)
Buttons are very useful if you want to control various switches of instruments, effects or your DAW itself !
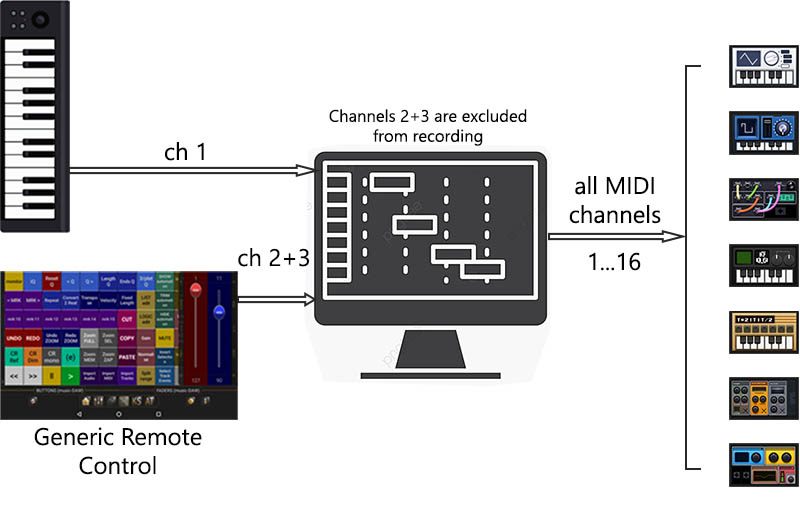
Almost every DAW has a special function which can be used to accept MIDI commands that act as a remote control.
On Cubase Pro and Nuendo, it’s called “Generic Remote Control”.
Please do not confuse it with Mackie Control, HUI or similar protocols.
This is where MIDI Program Changes come in handy !
Please refer to your DAW user manual to learn how to setup this special Remote Control.
The usual workflow is:
Or you can do it backwards:
As this is a MIDI procedure, you can record and edit the buttons taps into your DAW software.
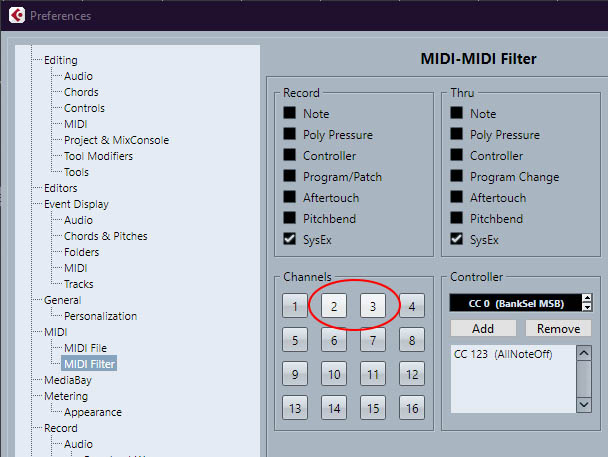
In case of Generic Remote Control, you have to assign these buttons on MIDI Channels other than channel 1 (range 2-16) and exclude these channels from recording MIDI events. See the image below taken from Cubase Pro. In this example, MIDI channels 2 and 3 are filtered out:
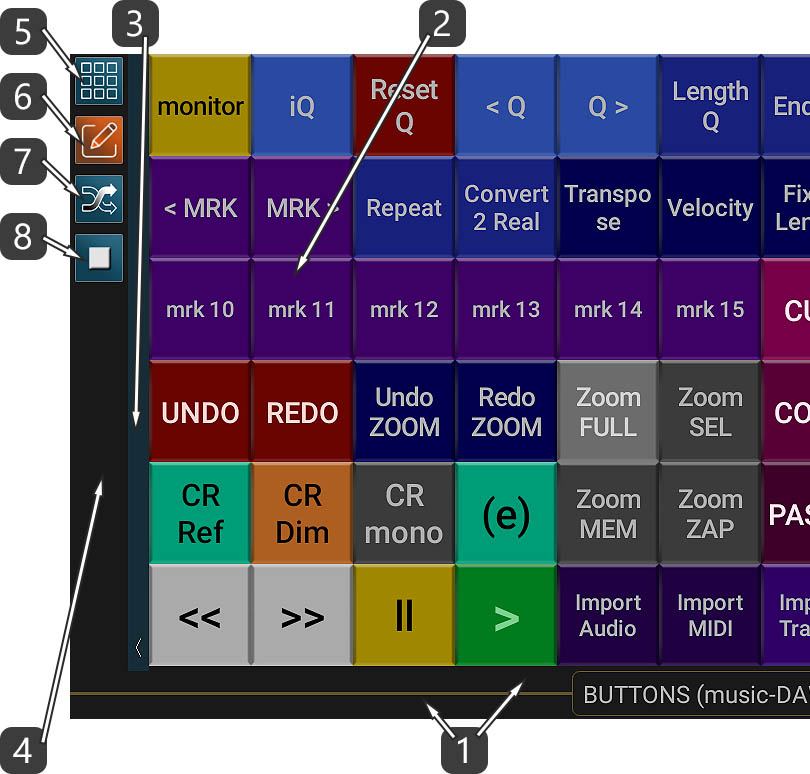
The TITLE BAR is also used as the SCROLL BAR for all buttons.
- Slide your finger on it to move around.
- If you tap 2 fingers on it you enter the SCROLL mode.
On instruction #8 above, the enable/disable state of a button refers to each one of the two functions of this button.This means that when you disable a button as controller, it stays enabled as program change and vice versa.
On instruction #6, while on Edit mode, swipe left or right on any button to swap its statefrom controller to program change or vice versa.
You entered this mode by following the instruction #1 of the Description section.
If you want to copy and paste all properties from one button to another,
just edit the 1st button, then go back and then edit the 2nd button and paste settings.
After this, make any changes you want.
When you edit a button, the properties that are copied into the clipboard depend on the Controller/Program switch of this button. This means that only one state of a button (controller or program change) can be copied at a time, not both !
Please refer to EDIT BUTTON screen / Description #1.